Quick and Easy Breakfast Wraps

I. Am. Not. A. Morning. Person. I have dreams of swanning out the door gracefully each morning having exercised, enjoyed a fresh made healthy breakfast, and written a chapter of my book, accompanied by my dressed and cheerful preschooler, pausing to survey my spotless floors with a satisfied smile before pulling the car out of the garage 10 minutes ahead of schedule. In reality? Let’s just say I’m well-versed in picking my top two priorities, letting the rest go, and counting it a success if I’ve held my patience all the way through.

I’m not giving up on my dreams though! One of the best steps I’ve made towards that perfect morning is dealing with breakfast on the weekend so I don’t fall prey to a frantic swing through a drive-thru where my options are both generally unhealthy and a waste of my food budget dollars. This week in particular, I’m kicking off a fresh start on my weightloss journey, so I made a batch of my favorite breakfast wraps. With just a few minutes of assembly, I have five little packets of joy in the fridge, ready to help me get out the door on those busy work mornings.

Although you can easily make a single wrap if you have time in the morning, the recipe below makes 5 wraps to take you through a work week. It’s followed by step-by-step instructions and some options for alternative ingredients.

Quick Breakfast Wraps

5 tortillas
10 egg whites or equivalent
5 Tbsp crumbled bacon
5 Tbsp shredded cheese
Taco seasoning to taste

Scramble eggs with taco seasoning and divide into 5 portions. For each wrap, fill 1 tortilla with 2 scrambled eggs, 1 Tbsp bacon, and 1 Tbsp cheese. Tuck in the sides of the tortilla and fold over like a burrito. Roll each wrap in a piece of foil and fold each end over to seal. Store in fridge up to 5 days. To serve, heat in toaster oven on foil, or unwrapped in skillet.

How To Make:

First, gather your ingredients. 
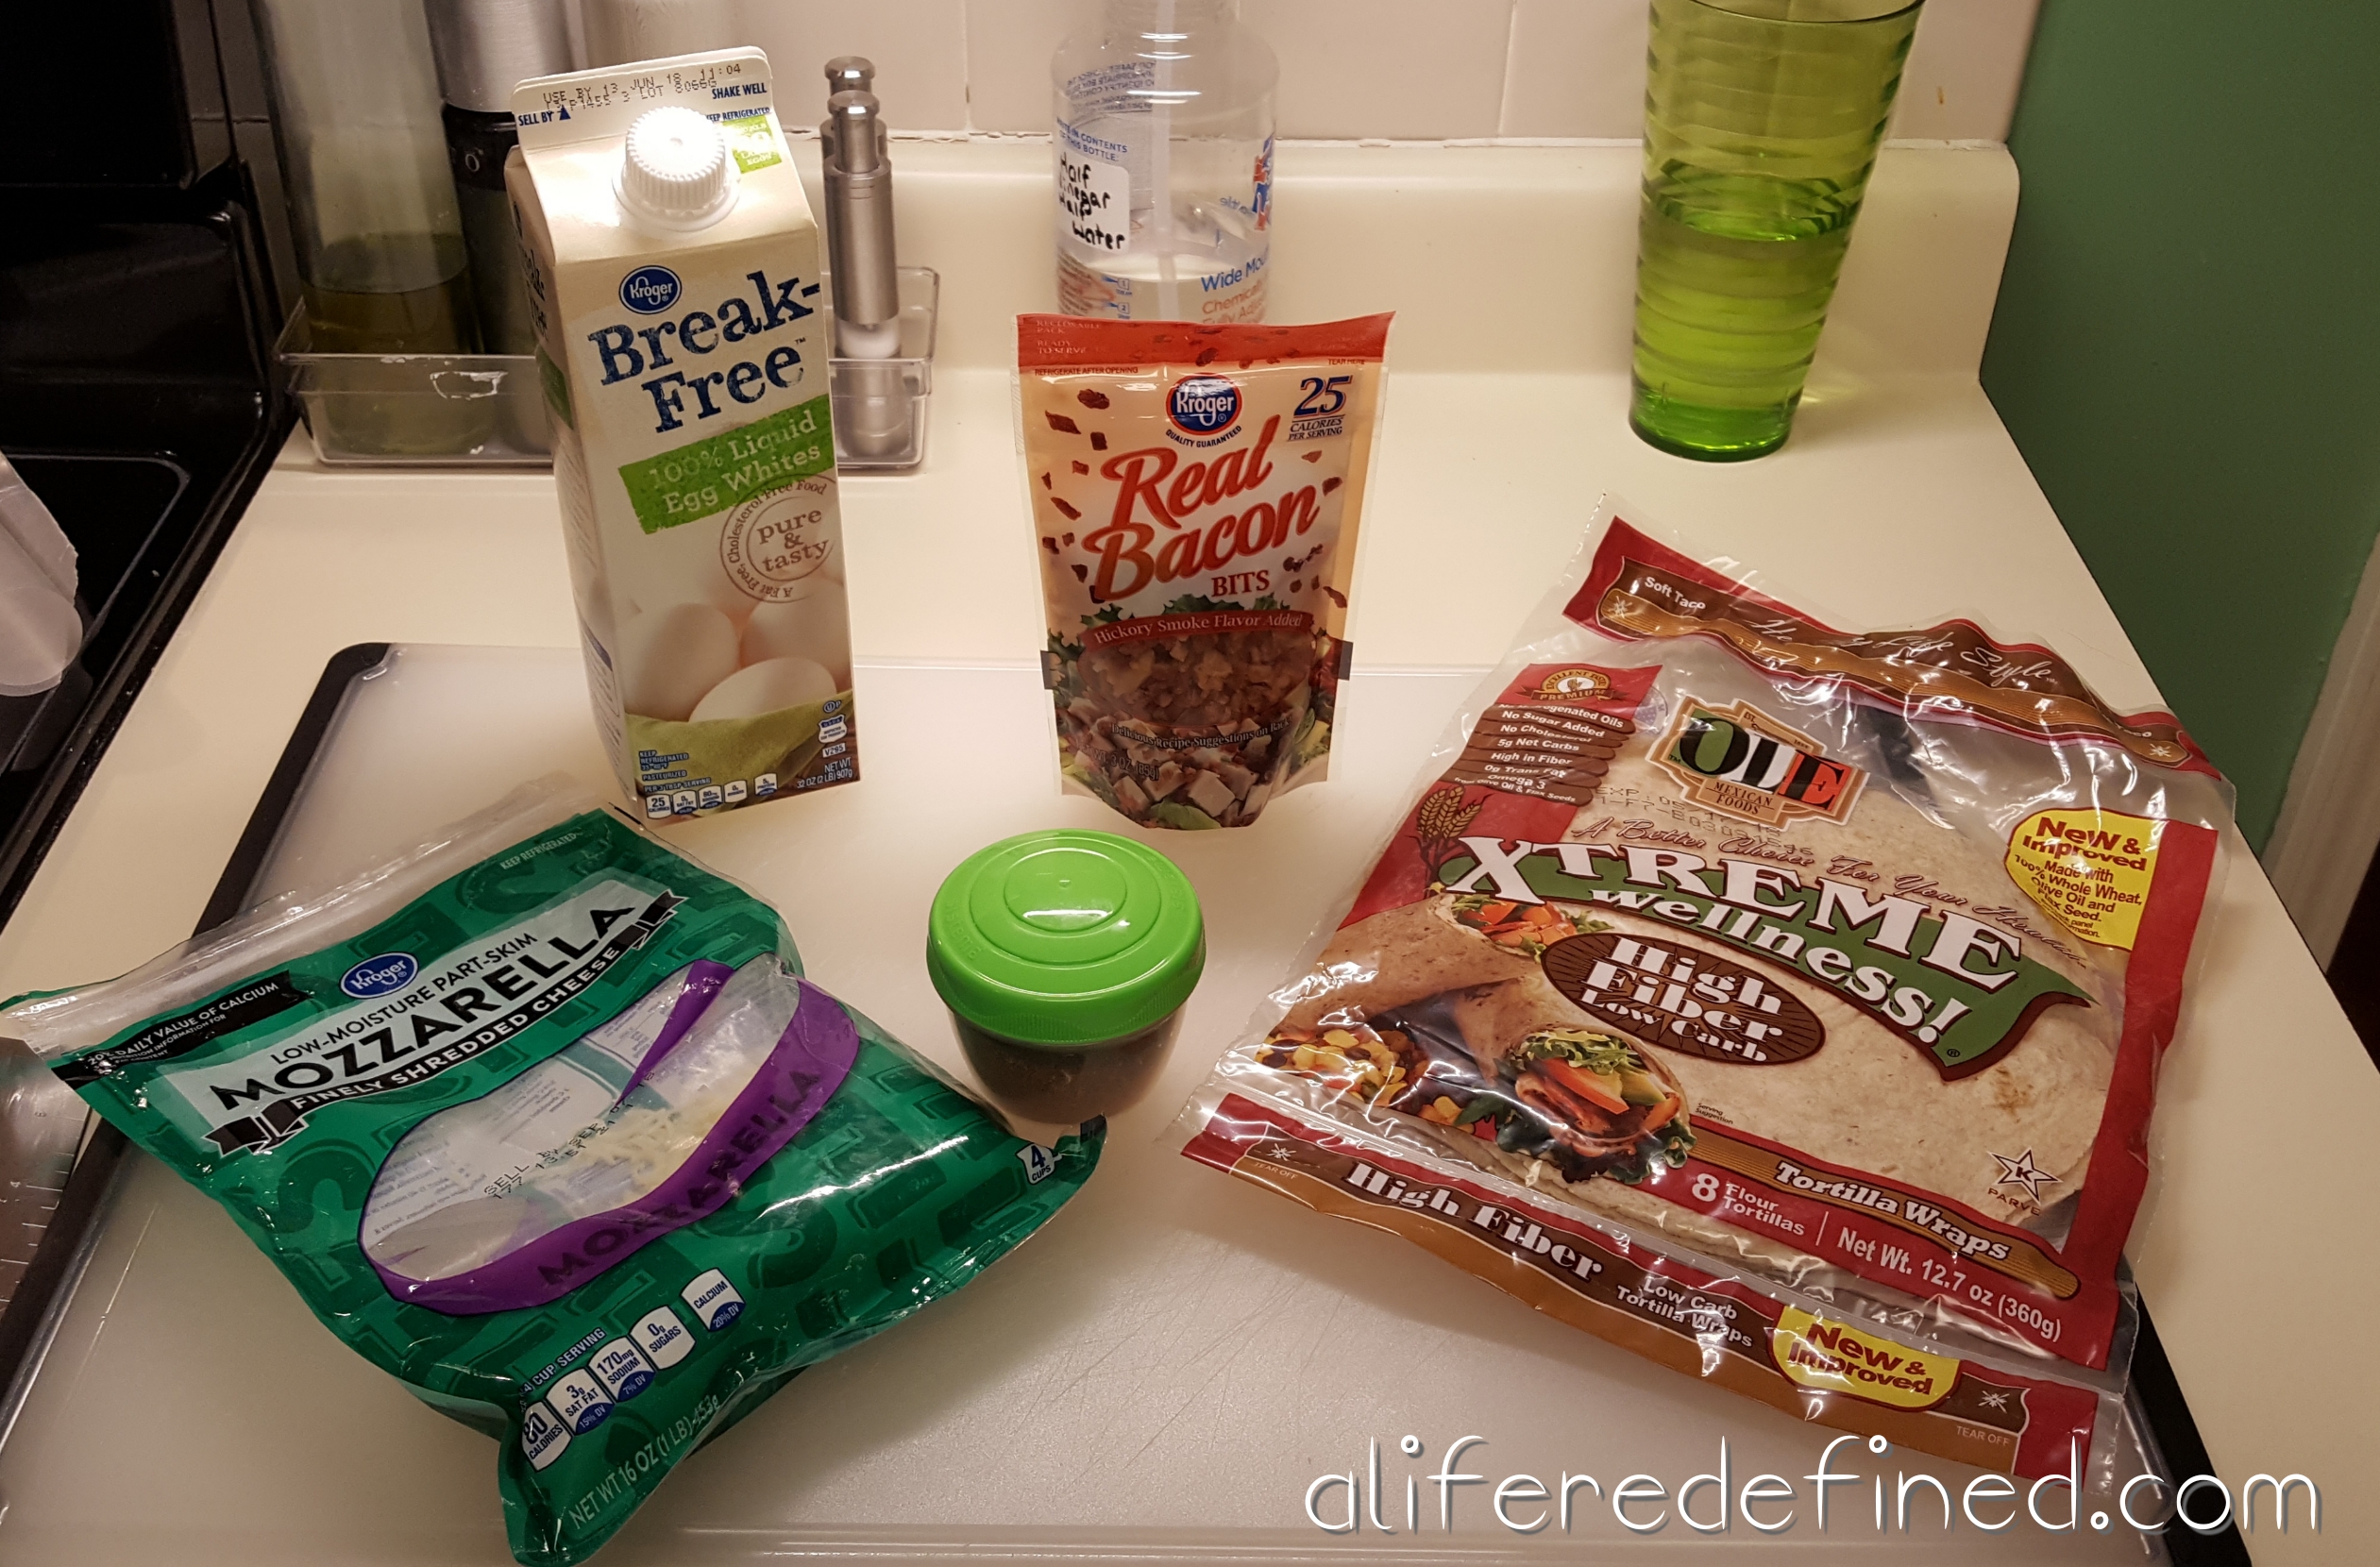
This is where the wraps are so flexible! I use the Extreme Wellness High Fiber tortillas, but you can use any kind of tortilla or flatbread. You can use whole eggs or egg whites or egg substitute. Your fillings can also be varied. I use real bacon bits for convenience, but I’ve also made them with pre-cooked chopped turkey sausage. You could use diced ham, or turkey, or Canadian bacon, or even skip the meat completely to make them vegetarian. And the cheese! I opt for part-skim mozzarella to keep the calories low, but you could use cheddar, smoked gouda… any melty cheese would work. And the taco seasoning is optional too! I make my own blend to control the salt and keep the heat on the milder side for my family, but you could omit it, use garlic and herb Mrs Dash, just use a pinch salt, or use any favorite herbs. You could even add leftover veggies, but I would advise against it (or lots of fresh herbs) unless you’re making the wrap to eat right away. Generally, vegetables or herbs with a higher moisture content don’t store as well when you’re making the wraps in advance.

Once you’ve decided on your ingredient choices, you’ll need to cook your eggs. To keep my prep time to a minimum, I microwave mine in a heat-proof glass bowl. While I prefer the texture of skillet-cooked eggs to eat by themselves, I don’t find it makes a difference in the wrap, and I love that they basically cook themselves while I’m measuring out the rest of my ingredients! I use egg whites from a carton for these, so I measure out the equivalent amount to give me 2 eggs’ worth per wrap and pour into my glass bowl sprayed with cooking spray. Then I stir in the taco seasoning. I rarely measure this, but for this batch I used 1 level teaspoon.

Seasoning eggs

Once the seasoning is blended in, microwave for 3 minutes.

While the eggs are cooking, on a large cutting board set out your 5 measured portions of bacon and cheese, leaving room for the eggs. Then, tear off 5 pieces of foil and set those and your tortillas to the side.

When your eggs come out of the microwave, be warned – they will only be partially cooked, and all of the seasoning will have concentrated into the cooked portion. This looks odd, but don’t worry a bit – with a spoon or whisk, just stir in a chopping motion to break up the cooked egg .

Partially cooked eggs

Put the eggs back into the microwave for 2 more minutes. When you take them out, they should be very slightly undercooked. With your whisk or spoon, stir and chop the eggs into small pieces. The seasoning will now be well-distributed, and the residual heat will finish cooking the eggs by the time you’ve finished stirring them. Overcooked microwaved eggs get a rubbery texture and a not-so-appealing grey tinge, so adjust the cooking times as needed for your microwave.

Turn the eggs out onto your cutting board and divide into 5 portions. Eyeballing is fine here – no need to spend extra time weighing or measuring. That’s a whole extra 2 minutes you can sleep work out in the morning!

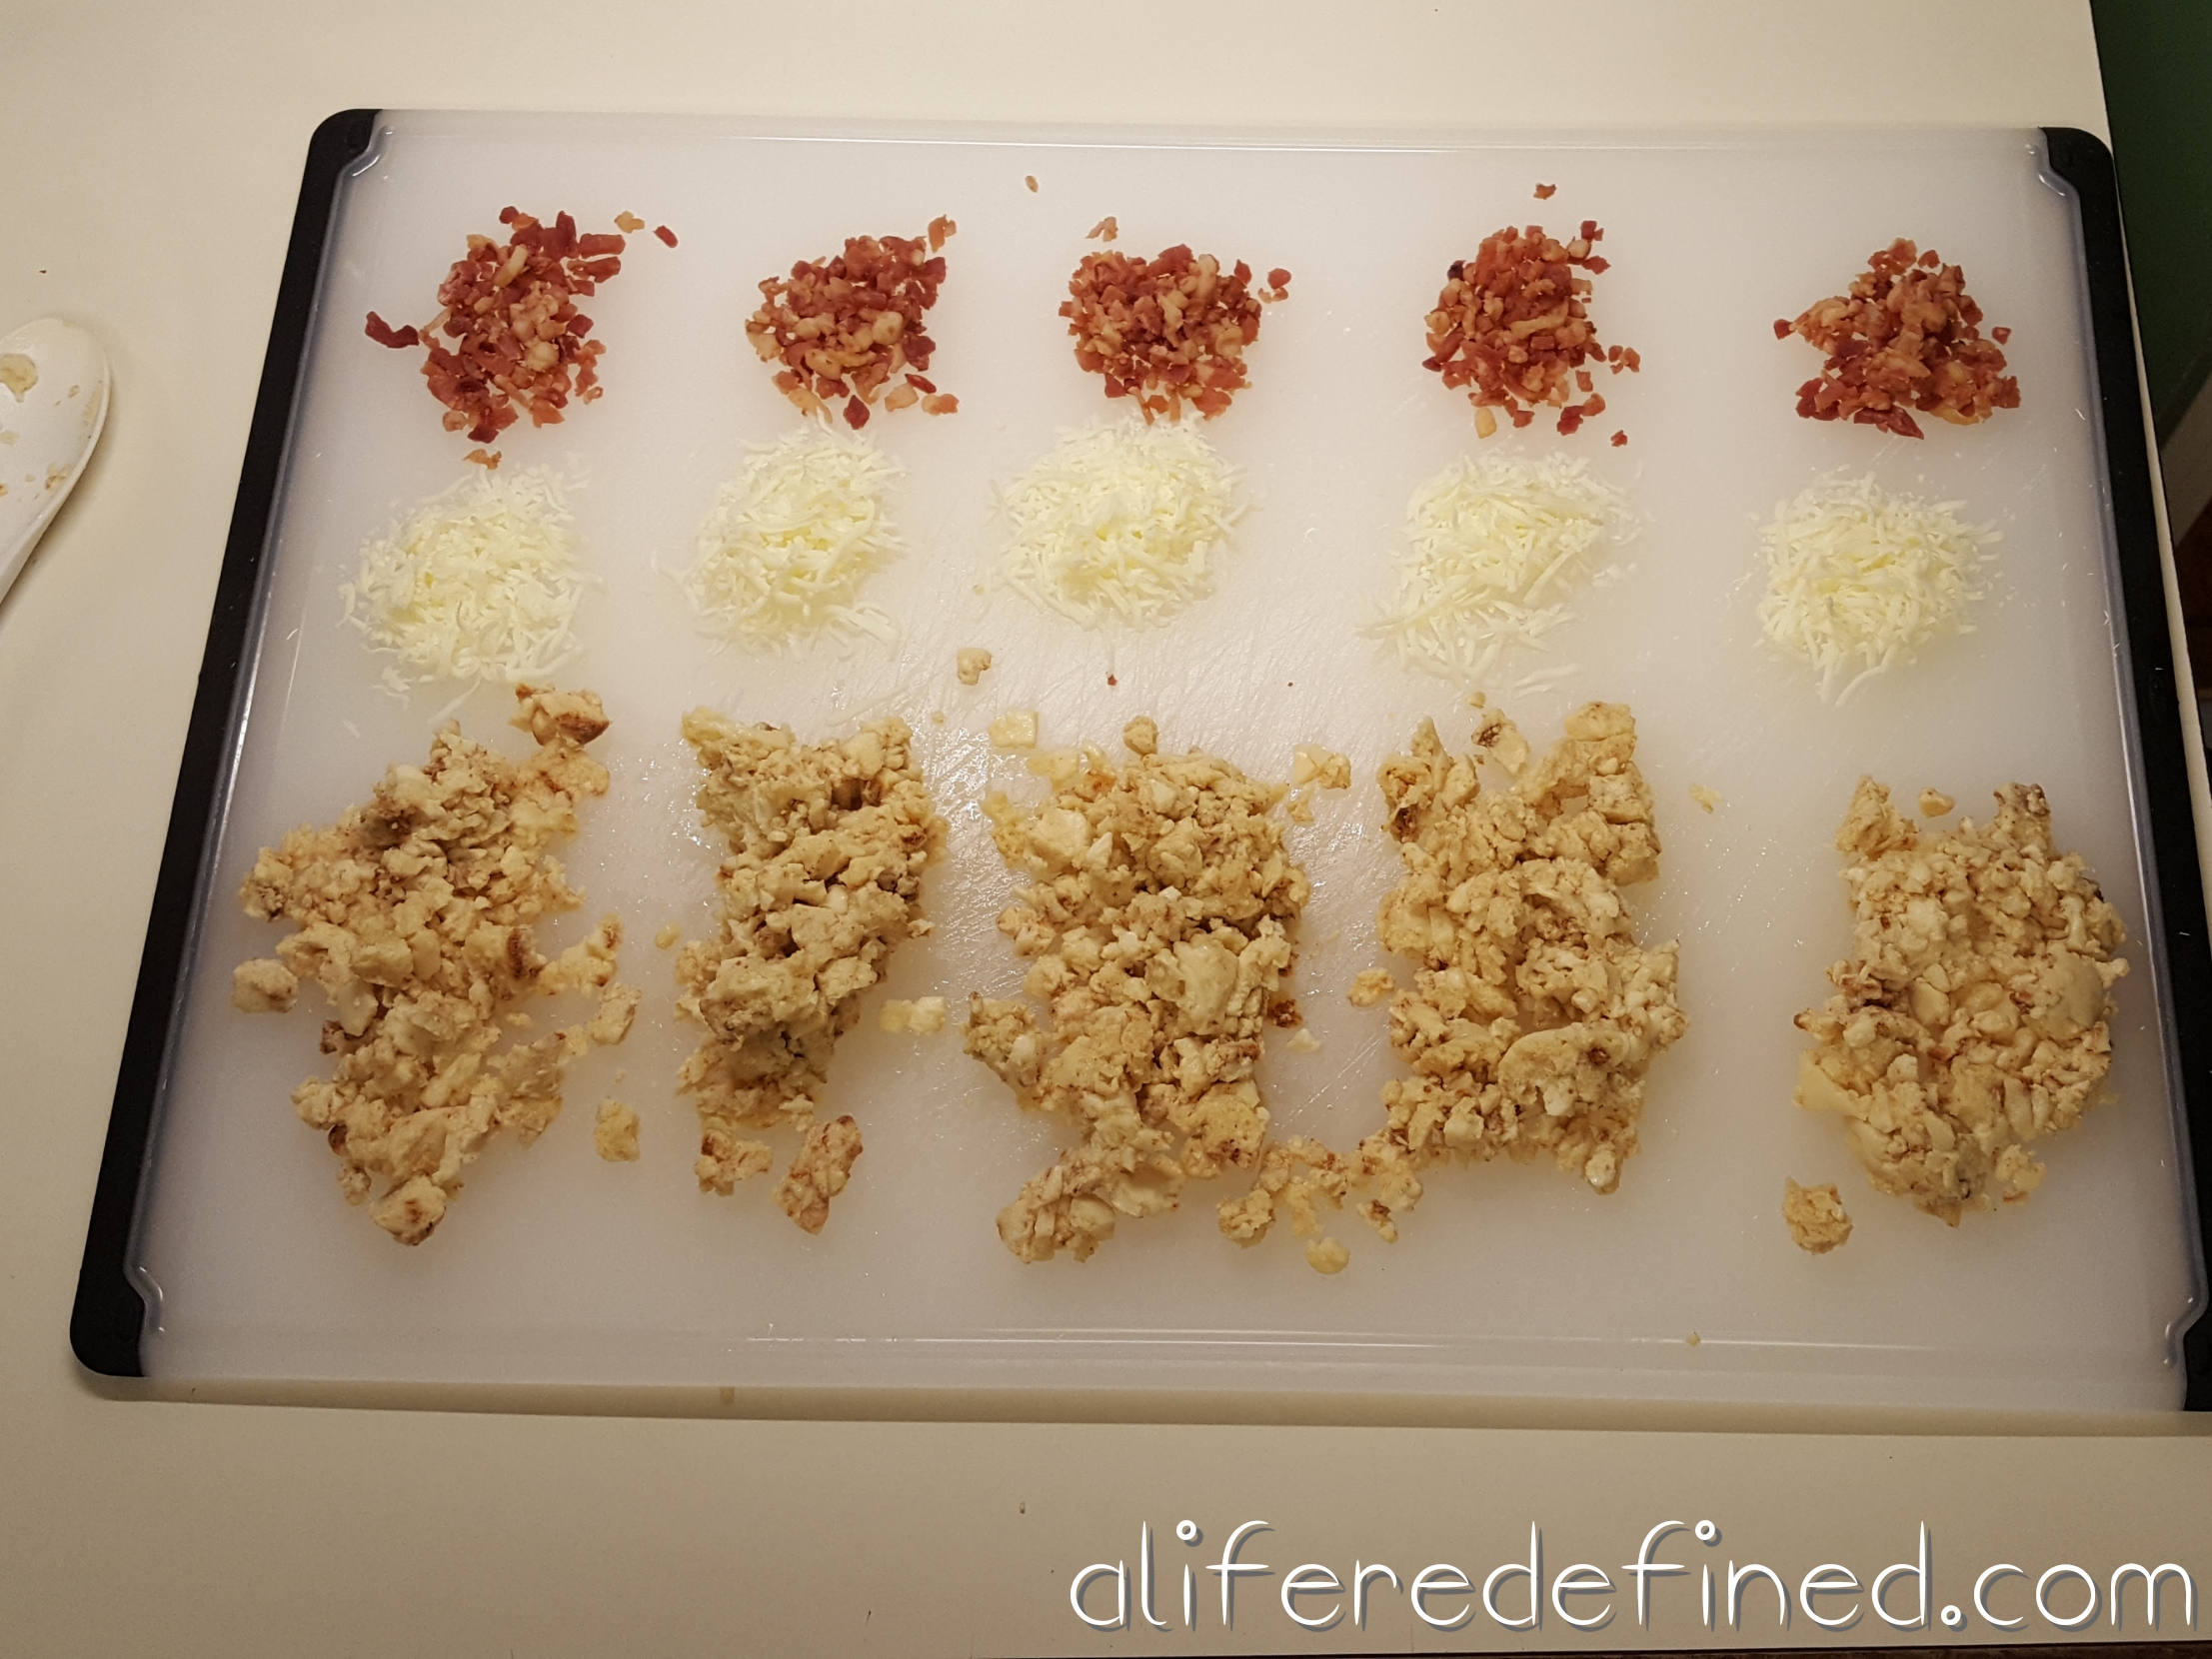
 I do recommend portioning them out like this rather than scooping from the bowl, since it allows the eggs to cool faster and keeps your last wrap from being a lot smaller than the rest. When your board looks like the one pictured above, you’re ready to wrap!

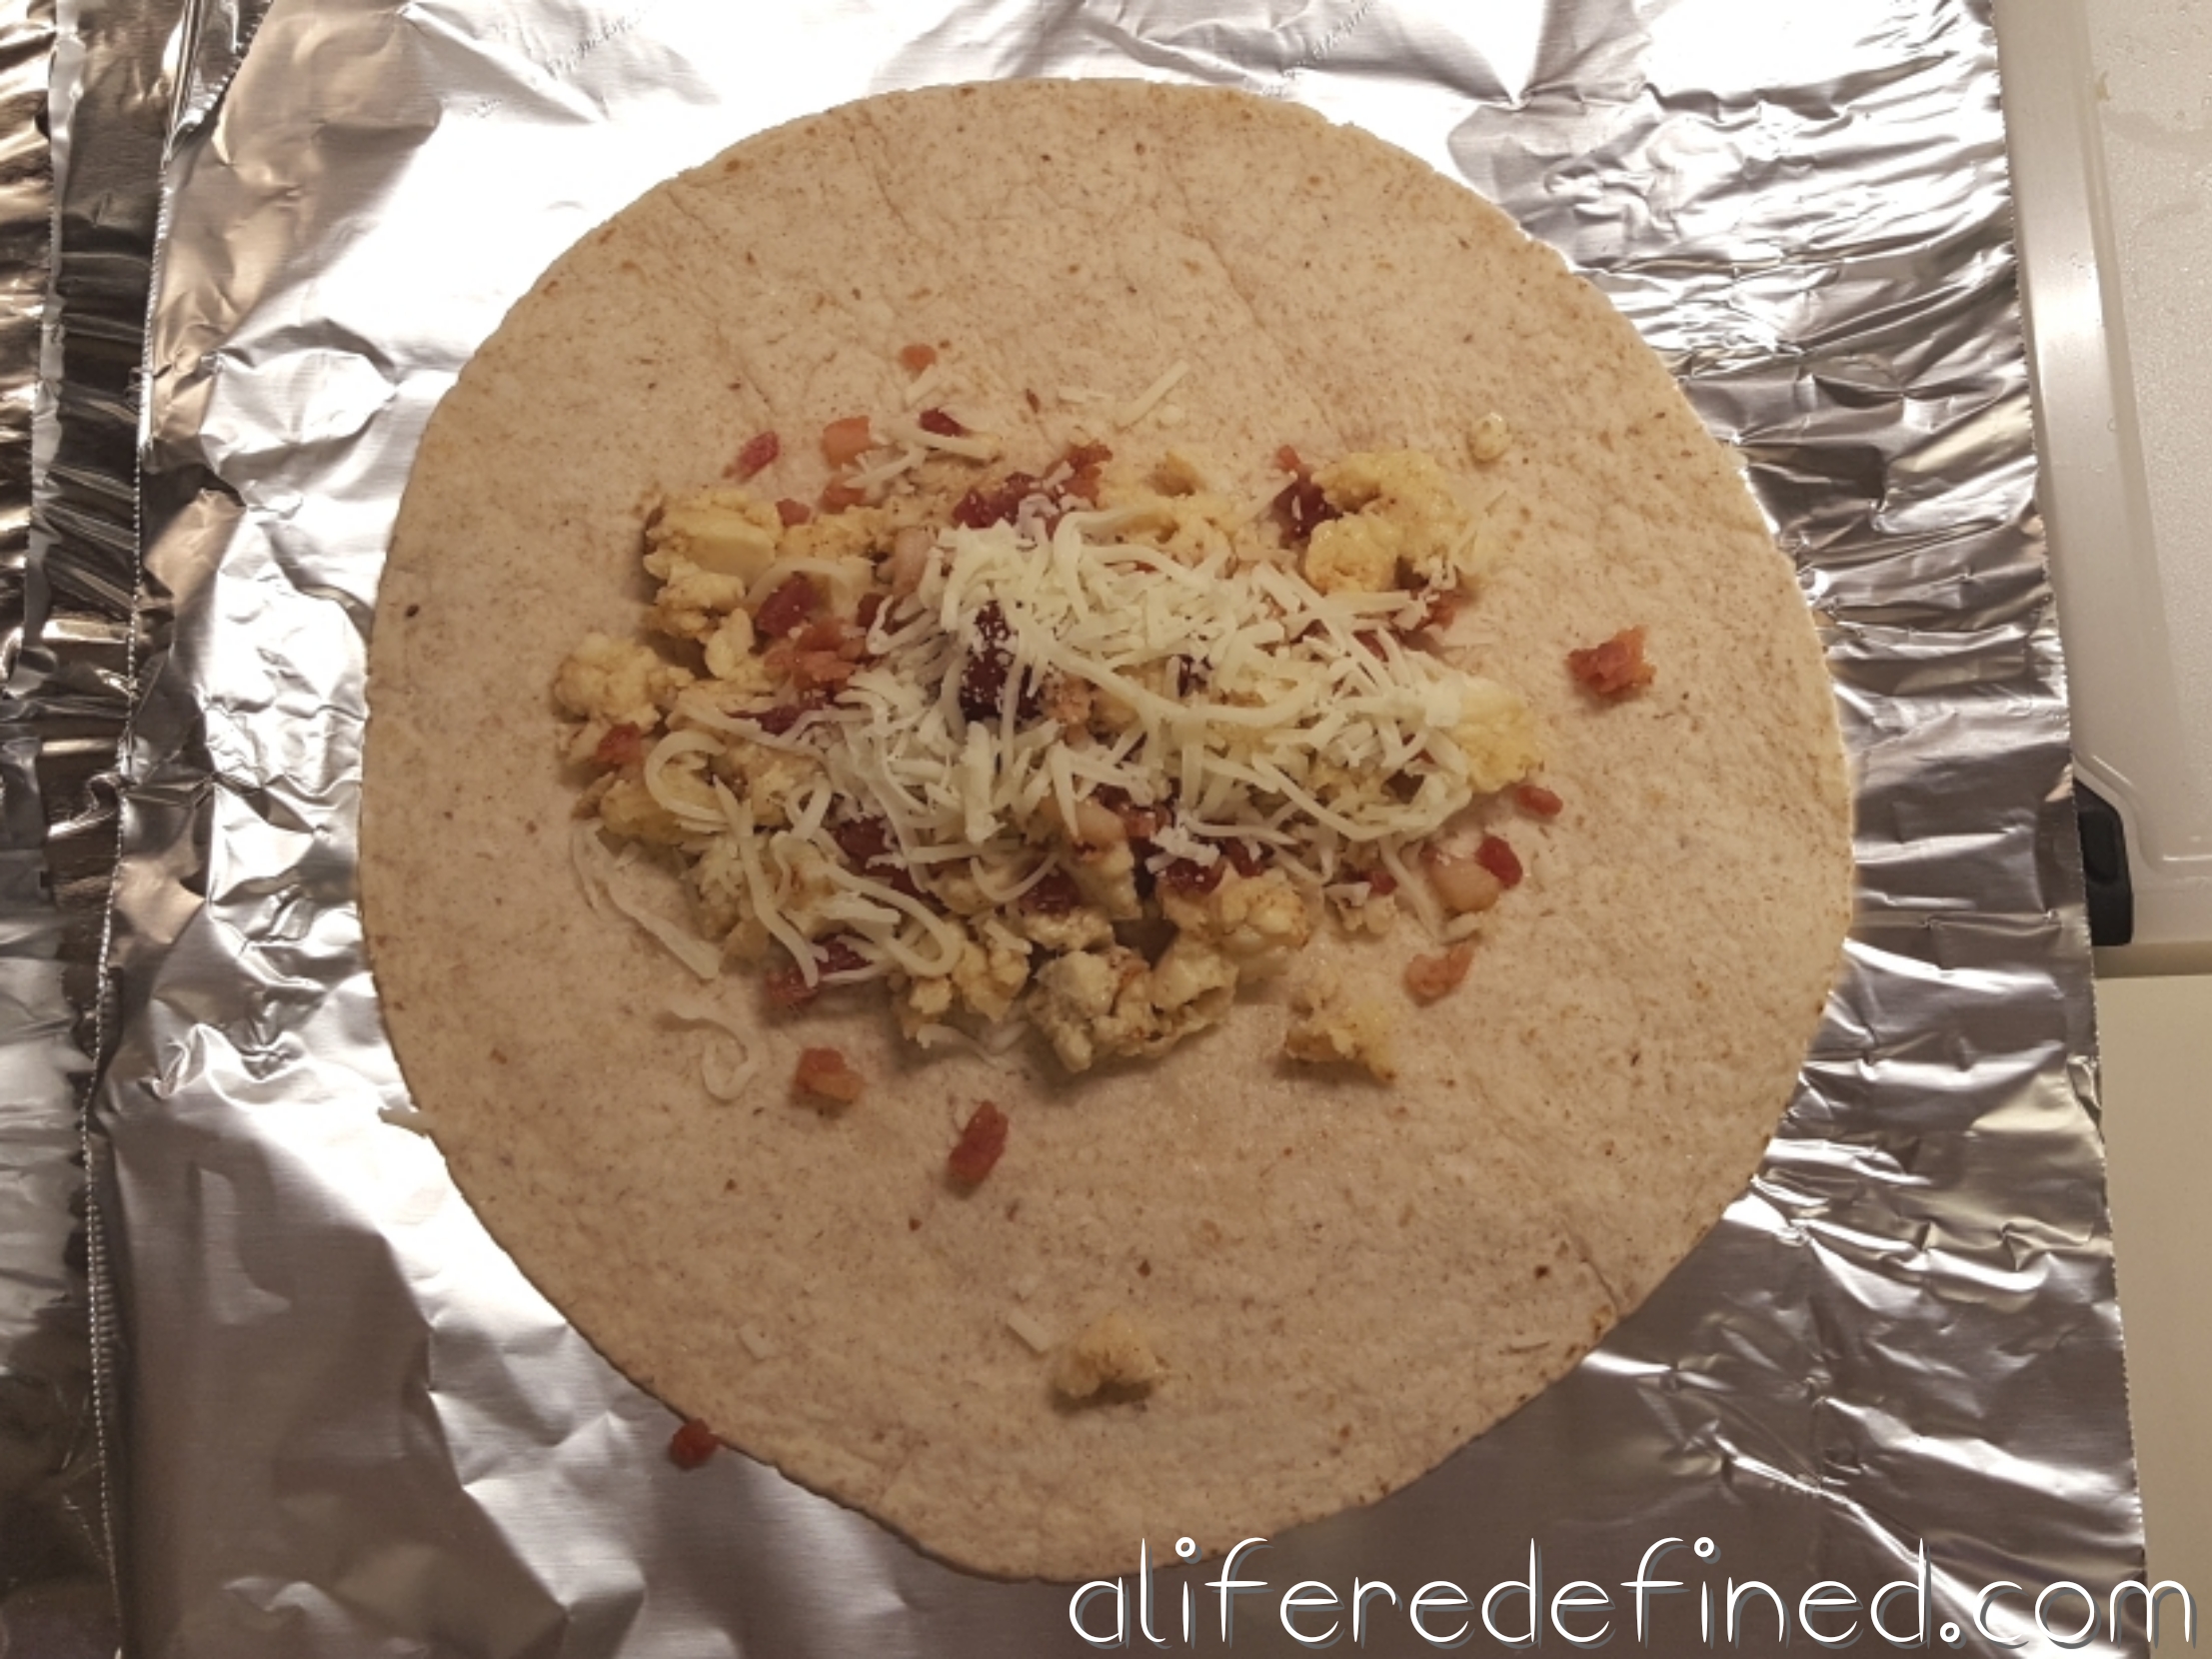
For each wrap, lay a tortilla on a piece of foil. In the center, add an egg portion and sprinkle with your measured bacon and cheese.

Tucking in the sides, fold your wrap over like a burrito. Wrap snugly in the foil, folding each end over and crimping to seal. Although you could use waxed paper or plastic wrap, I recommend foil because I heat these in my toaster oven. Remember – my goal is to get out the door as quickly as possible, and I generally eat these on the road if I’m commuting or as soon as I get to my local office. I don’t want to have to transfer them to a separate container for heating and then re-wrap them to be able to eat on the go! Instead, I run to the fridge a few minutes before time to go, pull out a wrap, toss it on the toaster oven on the highest toast setting, and finish getting ready. Then I just have to grab it (carefully) and tuck it in the side of my lunch bag with a napkin.

I hope you enjoy these! What would your ideal flavor combination include? And, what are your secrets for a smooth, orderly morning? I recently finished another project I’ll be sharing soon – I finally conquered the clutter of our “get out the door” items so my breakfast doesn’t get cold while we’re scrambling for backpacks and folders and keys!

Too Much of a Good Thing

This week has… not been so great. I’ve been over-committed and exhausted, and the worst part is, it’s all of my own doing! I’m generally pretty good at saying no to outside commitments, but it turns out, I can’t seem to say it to myself.

I’ve been giving this quite a bit of thought, and I think the cause of it is I’ve allowed my goals to get out of sync with my priorities. This is a bit embarrassing to admit – in my previous career, I was a corporate trainer who got paid to teach people how to set goals properly! So how is it still sometimes so difficult?

This past year has been a pretty unprecedented season of personal change for me. I’ve lost a significant amount of weight, which itself came after a time of some pretty deep emotional issues. I’ve craved simplicity like it was chocolate, and I’ve purged and organized all the closets and cabinets I can get my hands on. We’ve taken on a major financial project with the goal of being debt free, and while that’s just starting, I’ve been trying to keep my spending as limited as possible. So when the weightloss sparked several dropped clothing sizes, I’ve spent countless hours sorting old clothes, some to donate and some to sell (which takes way more steaming/steaming/photographing/listing time than I imagined!). Oh, and I changed roles again at my job a little over a year ago, and due to the nature of the work, much of it is still new to me.

So I find myself surrounded in self-improvement projects, and although I have more physical energy, my mental energy has drained rapidly the past few weeks. The mess of clothes in the guest room makes me twitch (oh, and we just went through our semi-annual kid’s consignment sorting and tagging extravaganza with Peapod’s stuff). I have blog ideas pinging around my brain but it takes time to document some of my projects with my camera as I’m working through them. I am trying to learn Instagram and other tools to build a cohesive media presence that might one day create a second income stream for my family. My husband’s schedule has gone out of sync with mine so preschool pickups are complicated and I can’t always get to my workout classes. And, the most frustrating thing of all is my weightloss has started to stall out!Busy mind

Is it possible to take on too much of good things? Heck yeah! What’s too much? Who knows! But here’s what I do know: when it all starts to go sideways, the only place to go is back to the basics. My time with God has to come back to the top of my daily to do list. Next are my family’s care and my physical well-being. I’m not entirely sure why I’m struggling so much lately to track and follow my eating plan, but it’s the only thing that works. I have had great success, but I’m nowhere near my final goal, and I don’t want to give up now! If I’m real honest, it’s only partly fatigue from doing this for so many months and more so the stress of my life whispering to me that food will take the edge off. It’s time to remember that I’m doing this to improve my life to be able to better deal with stress! As for the rest… I need to slow my roll.

That’s where the prioritizing gets a little tougher, I think. With my discarded clothes, I have felt like it was the fiscally responsible thing to try to get some of the value back to put towards other purchases. And that’s not a bad thing, but in my case, it may not be that good of a thing either. The key to that decision is, what is the opportunity cost to my time? It’s possible its time to let practicality trump dollars, donate them to a good cause, and enjoy the room to breathe.

With my blog writing and organizing projects and thoughts and how-tos…. it’s easy to get lost in analysis of what would get more views, widen my exposure, capitalize on a trend. But I believe God gave me the words to write the truth and insights from my life to be useful to someone else. And that’s how I’ll approach it going forward – I want to write my heart. And sometimes that might be how to cut a pineapple and sometimes it might be a meditation on a scripture. I want to connect with people and encourage them, more than I want a certain number of views or likes on Instagram.

Some of you may be the Type A to my Type B, and you may not struggle with this kind of thing at all. That is great! This is no condemnation of self-improvement. It’s just an acknowledgement that at some point in any of our lives, we can “good idea” ourselves right into some not-so-good moments. Let’s pay attention. We only have one life on this earth – let it be something lovely!

2 Ingredient Dough Pepperoni Pizza – Fast, Easy, Delicious!

  1. I first experimented with this method because I was looking for a healthier pizza option that was 1) fast, 2) easy and 3) really, really good. No sad, cardboardy frozen “diet” pizzas allowed here! This was an instant hit!!

It’s chewy, has a delicious, slightly sourdough flavor, can be flavored a million different ways, and cooks up perfectly every time. It’s husband and preschooler approved, and gets us to the dinner table (or couch, for movie nights) faster than ordering delivery.

To jump straight to the recipe, click here. For step-by-step directions, read on!

First get your ingredients ready.

You’ll need self-rising flour and plain, fat-free greek yogurt for the crust. If you don’t have self-rising flour, you can make your own! For each cup of self-rising called for, substitute 1 cup all-purpose flour plus 1 1/2 tsp baking powder and 1/4 tsp salt. I’ve made it both ways and found no difference, but I keep self-rising on hand now because it’s just faster (and we make it that often). For tools, you need a bowl, a spoon (and a whisk, if you want to break up any lumps in the flour first), measuring cups, and extremely clean hands. An eager-to-cook preschooler can also be a delightful kitchen accessory!

Dough ingredients

First, turn your oven to 450 degrees. Then measure your flour into the bowl. I use 1 1/2 cups of flour to 1 cup of yogurt. You can do a 1:1 ratio instead, but I’ve found the extra flour really enhances the texture of the crust and does not have a significant impact on points if you’re counting those. Before you measure the yogurt, be sure to pour off any standing liquid in the container. This is important – don’t try to stir it in first! You want the thickest part of the yogurt. Add the yogurt to the bowl and stir to combine.

Mixing dough

When the dough is beginning to stick together, add a little extra flour to your hands and form it into a single ball (or disc, it really doesn’t matter). Dust your work surface with a bit more flour and put your dough onto it. Knead the dough by pressing and turning for about 5 minutes or until it’s smooth. If it’s extra sticky, add a bit more flour to hands and counter. If it’s too crumbly, sprinkle a little water or add an extra dab of yogurt.

Dust your rolling pin and roll out the dough into a circle (or, as I prefer, a “rustic” circle, meaning a slightly uneven artsy “get dinner moving quickly” shape). You want it fairly thin, and about the size of a large pizza pan. Make sure your pan is very nonstick or is well-sprayed (I do both). Then, transfer the dough to the pan. A great way to do this is to lay it over the rolling pin and pick up the pin so your pizza dreams don’t flop to your perhaps not so food-grade floor.

Knead and roll

Use your fingertips to “bounce” over the dough, stretching it out a bit and making little divots (to better hold the sauce later). If you make a hole, just pinch it back together!

Press dough on panPut in the oven and prebake for 5 minutes. You just want it to be slightly firm, but not golden or browned at all. Take it out and set it aside while you finish assembling your toppings.

Pizza toppings

You can really get creative here, but I would recommend always starting with the pre-baked crust regardless of your topping combos. (BBQ chicken is our second favorite!) Brush or spoon your sauce over the crust, leaving a little bit uncovered around the edge. I prefer less sauce, so I use 1/3 of a cup, but you can use as much as you like. Next, layer on 1 cup of shredded mozarella, evenly distributing. Then add the pepperoni (I use 80g, but you can do more or less). Because we use turkey pepperoni, and it seems to curl more as it cooks, I stack them and cut them in quarters first. This also makes it easier to get plenty of peoperoni in every bite! Finally, for a super-cheesy finish, sprinkle 1/2 cup of shredded cheddar-jack over the top.

Ready to bakePop that beautiful thing back into the oven for 10 minutes, throw together a salad (or, in my case, a bag of frozen broccoli in the microwave) and you have dinner! Your oven time may vary slightly, but you want to see golden brown edges and evenly melted, slightly browned cheese. The pizza will have shrunken a bit as the dough has risen.

Perfectly cookedCut in 8 slices and dig in!

I’d love to hear from you in the comments- what are your favorite sauce/topping combos? Are you spicy-peppers-to-the-max, plain cheese, ham-and-chevre-with-a-honey-drizzle? The sky’s the limit!

Heidi’s Pepperoni Pizza

Crust:
1 1/2 cup self-rising flour (plus more set aside for kneading and rolling)
1 cup fat-free plain greek yogurt.

Sauce:
1/3 cup of any marinara sauce
80 grams turkey pepperoni
1 cup shredded part-skim mozarella cheese
1/2 cup shredded cheddar-jack cheese

Directions:
Add yogurt to flour in a bowl (drain liquid from yogurt before measuring). Stir to combine, then dust your hands with additional flour and press dough into a single ball. Turn dough onto a floured surface and knead for approx 5 minutes, pressing, folding, and turning dough until it’s smooth. Roll dough fairly thin into a circle and transfer to a well-sprayed pan. Bake at 450 for 5 minutes.
Remove crust from oven and brush with sauce, leaving a bit of the edge bare all around. Evenly cover with the mozarella, then add the pepperoni pieces. Finally, sprinkle the cheddar-jack cheese over the top. Bake for an additional 10 minutes or until the edges are golden brown and the cheese is melted and bubbly. Cut into 8 slices to serve.

Sliced and readyReturn to top

By the way, I’ve provided links below to some of the items I use and love in my kitchen constantly (I think I got the rolling pin and mixing bowls from our wedding registry 13 years ago and they are still going strong!). These are affiliate links, meaning if you use them to make a purchase, I get a small commission at no extra cost to you.

OXO Softworks Rolling Pin: https://amzn.to/2IO3MZ9

OXO Non-skid 3qt Mixing Bowl: https://amzn.to/2uiiPqJ

Farberware Measuring Cups: https://amzn.to/2INVWyD

Thanks for visiting! If you enjoy this, feel free to share it with a friend, Pinterest, or the world in general!

*We are a participant in the Amazon Services LLC Associates Program, an affiliate advertising program designed to provide a means for us to earn fees by linking to Amazon.com and affiliated sites.

Blogiversary! Redefining Again…

I started this 6 years ago for a place to basically dump my random thoughts. I was almost 40, struggling with infertility, trying out clean eating, and striving to grow in grace.

Since that day I lost some weight, had a miscarriage, had my beautiful daughter, struggled with undiagnosed post-partum depression, had my family life nearly implode as my husband went through a difficult employment period and dealt with medical issues, saw our finances take a direct hit, did the hardest work of our lives to restore our stressed-to-the-max marriage, changed roles twice at my job and, after quickly losing the baby weight, gained somewhere around 70 stress pounds in about a year.

Tired from reading that? I definitely was, and my eating habits sure didn’t give me any extra energy to deal with it all. I didn’t want to feel the way I did, but I knew I had to deal with my emotions before I could deal with the weight. Bit by bit, with counseling, and fresh honesty, and many prayers, things got better. Or we got better at letting go of what didn’t matter.

Before and AfterOn 5/9/17 I turned 45. I knew I was ready, and I decided to sign up for Weight Watchers. I started on 5/12/17 and set my goal at a healthy weight for my height. I’d been some version of overweight all my life, and I’d always hedged my bets by “just trying to lose 20 pounds and see how I did.” This time, I was all in. And as of 3/18 I’m down about 85 pounds so far.

Many things about my life are still in the process of changing. I’m several sizes smaller, so I’ve had to deal with discarded clothes and new clothes, but since we’re also tackling our finances, I have to be pretty savvy about how I keep my wardrobe updated, and I’ve gotten pretty good at it. We’re working towards being debt free, which is overwhelming and exciting. I’ve completely changed the way I eat (and boy can that be a budget-buster too) and I have some great meal ideas and snack tips. My daughter is now a preschooler, and I’m continually learning how to mom and do it with grace, humor, and again, a budget. And feeling so much better in my skin (and my brain), I want my environment to match, so I’ve been gradually organizing/purging/konmari-ing our house. Got some good ideas there too!

So to get all those ideas out, I’m re(de)fining my content here. You can still read all those old posts under the Archive category, but going forward, my content will mostly fall in these three areas:

  • Simplify: Organization, budget streamlining, time-saving
  • Beautify: Weightloss, fitness, meal planning, possibly even some crafty type things
  • Glorify: I know that everything I do is nothing if it is not grounded in the God who created me, redeemed me, and rescued me. As I seek his face, I’ll share my journey into Grace.

Come along for the ride! You can click the Follow button at the right (or at the bottom on mobile)  to be notified when a new post goes up, and follow me on Instagram to see what I’m into!